
TL;DR
Moving your rig into a closet can drastically cut noise and improve sound quality if you treat reflective surfaces and manage heat. Placement, absorption, and ventilation are key to making it work well.
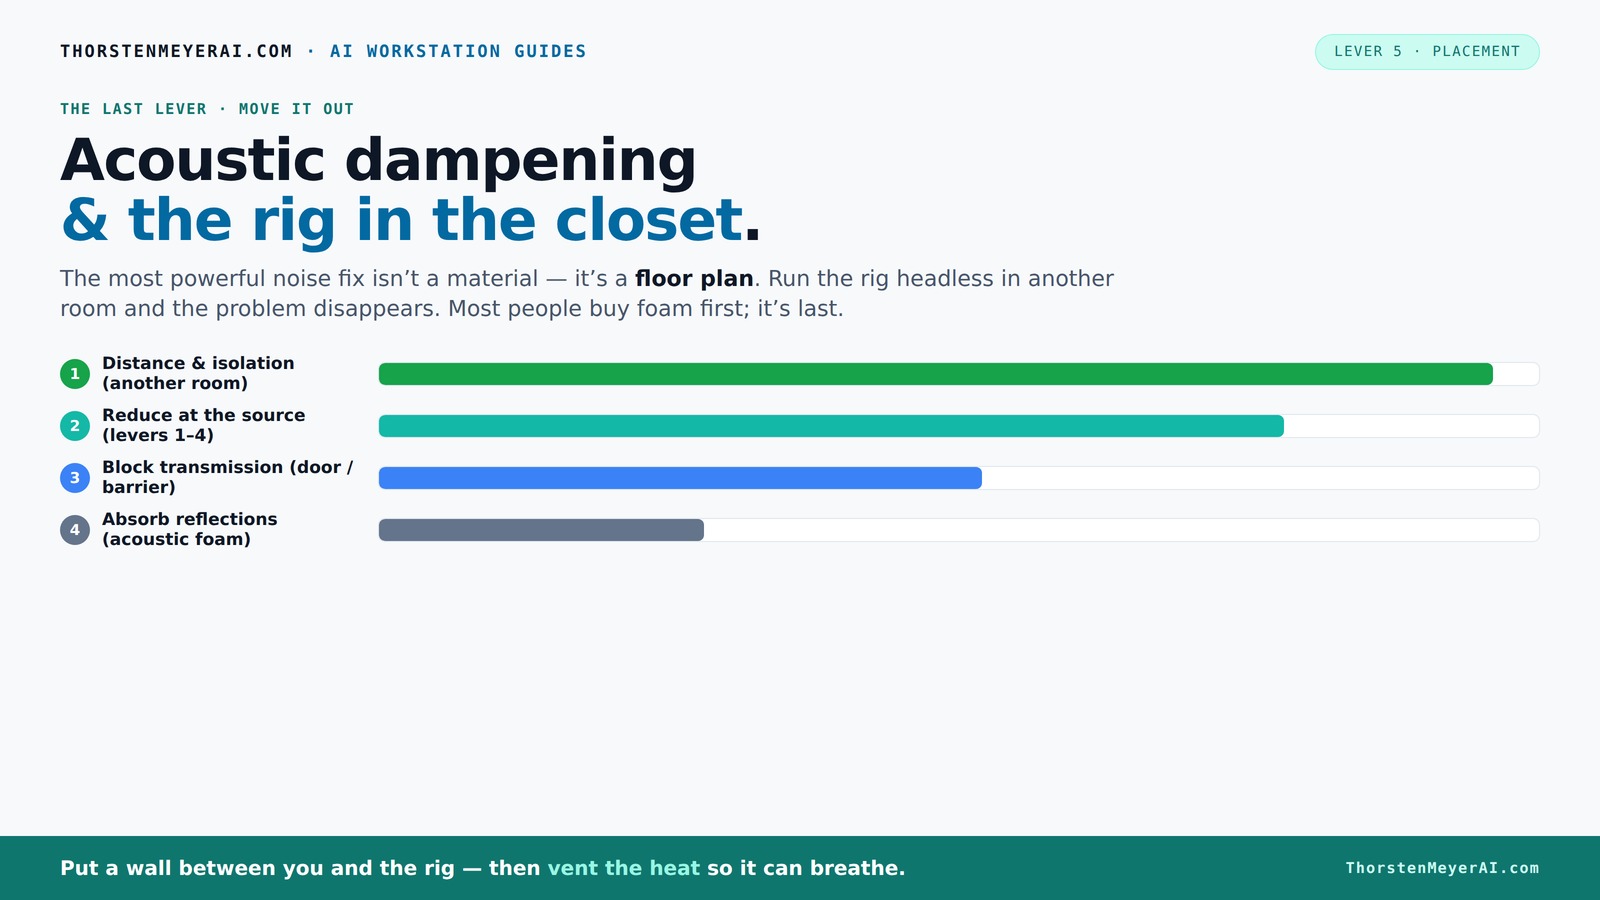
Acoustic dampening
& the rig in the closet.
The most powerful noise fix isn’t a material — it’s a floor plan. A rig you can’t hear because it’s in another room beats any amount of foam. Tap the approaches in Part 1 to see what actually works.
(another room)
(levers 1–4)
(door / barrier)
(acoustic foam)
Contain the noise, not the heat
Key Takeaways
- Prioritize placement and treatment of reflective surfaces before adding foam or bass traps.
- Use a combination of absorption (foam, blankets) and isolation (grommets, decoupling) to control sound.
- Treat the main reflection points — behind the mic, ceiling, and door — for noticeable improvements.
- Manage heat with ventilation — passive vents or quiet exhaust fans prevent overheating in enclosed spaces.
- A closet can be a surprisingly effective vocal booth with proper planning, treatment, and ventilation.

54 Pack Sound Proof Foam Panels |12"×12"×1" Quick-Recovery Soundproof Wall Panels | High Density Sound Dampening Panels for Home Studio |With Adhesive Stickers 270PCS
Superior Acoustic Treatment: These sound-absorbing foam panels effectively dampen echoes and reverberations for enhanced audio clarity and quality
As an affiliate, we earn on qualifying purchases.
As an affiliate, we earn on qualifying purchases.
Why a Closet Can Be Your Best Soundproofing Ally (or Worst Nightmare)
Most people think small spaces like closets are just bad for sound, but they can be optimized with proper acoustic treatment. The truth? They can be perfect — if you treat them right. Closets are naturally reflective, trapping echoes and creating a muddy, boxy sound. But they also block sound from leaking out, making them ideal for a budget vocal booth. The trick is knowing how to manage the reflections and low-end buildup, and whether you can keep your rig cool.
For example, a YouTube creator turned her closet into a vocal booth using foam on the walls and blankets on the door. Her recordings improved dramatically — clearer vocals, less echo. But she also learned the hard way that heat buildup was real. A tiny space with no ventilation turned into a furnace after just an hour of recording.
Understanding the dual nature of closets helps you make informed decisions. If you only focus on soundproofing without considering heat and reflection, you risk creating a space that sounds good but becomes unusable due to overheating or echo. Proper treatment can mitigate reflections, but neglecting ventilation can cause equipment to overheat, leading to distortion or damage. The key is balancing sound absorption with effective airflow — a tradeoff that, when managed well, results in a practical, high-quality recording environment.

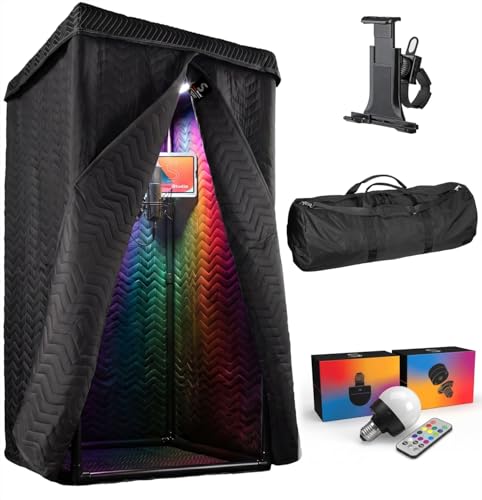
'Snap Studio' The Original Vocal Booth, Pro Sound Blankets, Portable Studio-Grade Recording, Sound Isolation, Trusted Globally By Professional Artists, Musicians, VO, Podcasters
#1 Recommended Portable Recording Booth — Featured by Rolling Stone Magazine as the “best sound booth”, Snap Studio’s...
As an affiliate, we earn on qualifying purchases.
As an affiliate, we earn on qualifying purchases.
How to Position Your Microphone for the Best Sound in a Closet
Where you place your mic makes more difference than most people realize. In a small, reflective space, the main reflection point is often right behind your mic. You want to avoid placing it too close to the back wall or reflective surfaces, which can cause harsh echoes.
Here’s a quick step-by-step:
- Position the mic about 6-12 inches away from your mouth — closer than in a big room. This proximity helps reduce room reflections and emphasizes your voice, making the recording sound more intimate and clear.
- Angle it slightly downward or upward to minimize reflections bouncing directly into the capsule. Small angle adjustments can significantly reduce comb-filtering effects and harshness caused by reflections.
- Experiment with the mic’s position relative to the closet walls — sometimes a few inches can change the sound dramatically. Moving the mic slightly off-center or adjusting height can help find the sweet spot where reflections are minimized.
For example, a singer moved her mic 4 inches away from the wall behind her and adjusted angle slightly. Her vocals went from muddy to clear overnight. This illustrates how small positional tweaks can have a big impact on clarity and tone, especially in confined spaces where reflections are more pronounced. Proper mic placement reduces the need for excessive treatment, preserving natural sound quality while controlling unwanted echoes.
'Snap Studio' XL Portable Recording Booth | '#1 Vocal Booth' Rolling Stone | Record Crisp Dry Echo-Free Vocals at Home or On-The-Road | The Original & Best Studio Booth, Trusted By Singers & Voiceover
#1 Recommended Portable Recording Booth — Featured by Rolling Stone Magazine as the “best sound booth”, Snap Studio’s...
As an affiliate, we earn on qualifying purchases.
As an affiliate, we earn on qualifying purchases.
Treat Reflective Surfaces First — Walls, Ceiling, and Door
In a tiny space, the biggest source of echo isn’t the mic — it’s the surfaces around it. The walls, ceiling, and the door are the main culprits for reflections; learning about acoustic dampening can help. Covering these with absorption materials reduces reverb and makes your recording sound more natural.
Start with the most reflective surfaces. For example, use foam panels or blankets on the back wall, ceiling, and door. Focus on covering at least 20-30% of the wall surface for noticeable improvement. Thick panels (2-4 inches) absorb lower frequencies better, which is crucial in small rooms where bass buildup often occurs.
However, the choice and placement of these treatments matter significantly. Covering too little leaves reflections that muddy the sound, while over-treating can dull the tone and reduce the room's natural liveliness. Striking a balance is essential: prioritize the main reflection points, but avoid creating a completely dead-sounding space. Layered blankets and foam can be combined for a cost-effective, flexible treatment plan. The goal is to cut down on echo without sacrificing tonal warmth, which requires understanding the room’s specific reflection patterns and adjusting accordingly.

8" Room to Room Fan with Remote, Reversible Through Wall Fan for Quietly Circulating Air, 320 CFM Through the Wall Fan with Temperature Control, Durable Build Quality, In Wall Fan for Closet, Laundry
【QUIET, MOVE MASSIVE AIR】 This room to room fan quietly circulates air between two rooms to maintain a...
As an affiliate, we earn on qualifying purchases.
As an affiliate, we earn on qualifying purchases.
How to Manage Low-End and Prevent Muddy Sound
Small, parallel-sided closets tend to trap bass, creating a boomy, muddy sound. To combat this, install bass traps in the corners. These can be commercial foam traps or DIY versions made from thick mineral wool wrapped in fabric.
Bass trapping is crucial because low frequencies tend to resonate and build up in small, enclosed spaces. You can find tips on effective bass trap placement. Without proper treatment, your recordings will sound muffled and indistinct, especially on vocals and instruments with rich low-end content. Installing bass traps in the corners helps absorb these frequencies before they bounce around and muddy the mix. Thick panels (at least 4 inches) are more effective because they can absorb lower frequencies more efficiently. Be aware, however, that adding bass traps can also affect the overall tone — too many or too thick traps can make the space sound dull or boxy if not balanced with other treatments. The tradeoff is between controlling muddiness and maintaining natural warmth, so consider your specific needs and experiment with placement to find the optimal setup.
Ventilation & Heat — Keep Your Closet Rig Cool and Safe
Putting a hot, high-load machine in a sealed closet is a recipe for disaster. Learn about ventilation solutions for small spaces to keep your equipment safe. The heat builds up fast, throttling performance, and risking damage. The key? Ventilation. You need a way for hot air to escape and cooler air to come in.
Options include: ventilation and cooling tips for enclosed spaces.
- Passive vents with adjustable covers — simple and inexpensive, but may need careful placement to ensure proper airflow.
- Quiet exhaust fans that draw hot air out — more effective, especially in tightly sealed spaces, and can be very quiet if chosen correctly.
- Using a purpose-built soundproof cabinet with ducted airflow — ideal for professional setups, providing both sound isolation and heat management.
For example, a hobbyist installed a small, quiet exhaust fan in his closet door vent. His rig stayed cool even after hours of continuous load, and his recordings remained clean and quiet. Proper ventilation not only protects your equipment but also ensures consistent performance and sound quality. Overheating can cause distortion, reduce mic sensitivity, and even damage gear. Therefore, balancing noise control with effective airflow is essential — a small investment in ventilation can save you from big headaches down the line.
Putting It All Together: From Space to Studio
Once you’ve handled placement, treated the surfaces, and set up ventilation, you’re almost there. The goal is a space where sound is clear, reflections are minimized, and your rig stays cool. It’s about balance — too much absorption can make your space sound dull, too little and it stays echoey.
Start small: treat the main reflection points, add bass traps where needed, and ensure airflow. Test your setup by recording vocals and listening for echo, muddiness, or heat issues. Adjust as necessary.
Remember: the best setup is one that fits your space, budget, and needs. A closet can be a quiet, effective studio — if you treat it right and keep it cool.