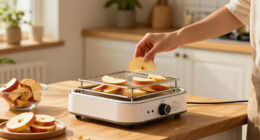


Use this guide to prepare and dry fruit, vegetables, or herbs in an electric food dehydrator, then check and store the finished food. It is for beginners using a home dehydrator with adjustable trays and temperature settings. Preparation usually takes 30-60 minutes; drying can take several hours, depending on the food, slice thickness, appliance, and room conditions.

Get health and wellness essentials delivered free with Prime
- Fast, free delivery on millions of items
- Prime Video, Amazon Music and more included
- Member-only deals all year
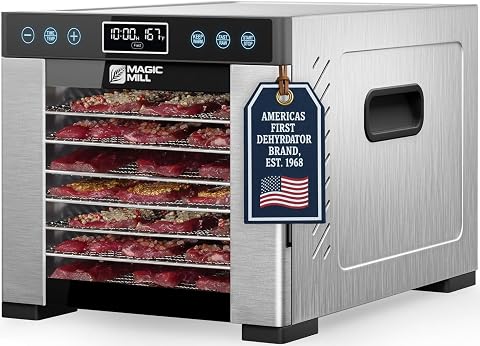
Magic Mill Pro Food Dehydrator Machine
- ✔ Wattage: 600 W
- ✔ Trays: 7 full-size stainless steel trays
- ✔ Temperature range: 95°F–176°F, 1°F increments
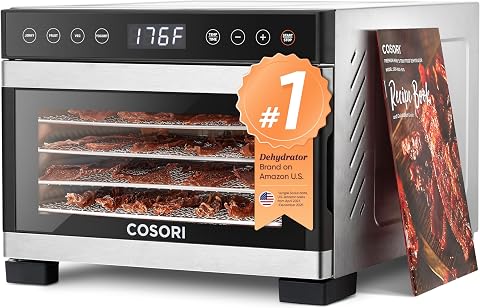
Cosori Food Dehydrator, 5 Stainless Steel Trays
- ✔ Wattage: 480 W
- ✔ Trays: 5 stainless steel trays
- ✔ Drying space: 3.1 sq ft

Magic Mill Food Dehydrator Machine, 5 Stackable Trays
- ✔ Wattage: 240 W
- ✔ Trays: 5 stackable stainless steel trays
- ✔ Temperature range: 95°F–167°F
Difficulty: Beginner | Time: 3-12 hours of drying, plus 30-60 minutes of preparation
What You’ll Need
Tools & Materials:
- Electric food dehydrator with trays and a working temperature control
- Clean knife and cutting board
- Colander or clean towels for washing and draining
- Airtight containers or food-grade storage bags
- Labels and a pen
- A food thermometer for checking dried meat, if making jerky
Knowledge:
- Basic knife safety
- How to follow the dehydrator manual and a tested recipe
- For jerky, how to follow food-safety guidance for the meat and its required heating step
Choose a reliable recipe for the specific food you plan to dry. Drying time and temperature vary by food and appliance, so do not treat one setting as suitable for everything. Drying alone may not make raw meat safe: use a tested jerky method that includes the required heating step. Do not use a dehydrator with a damaged cord, plug, or housing.
Magic Mill Pro Food Dehydrator Machine
The Magic Mill Pro is the most capable batch dryer in this group on paper. Its seven full-size trays give us more listed layers than either five-tray alternative, and the 600-watt rear-fan system is designed to move heated air across the trays without routine rotation. That setup makes it a stronger fit for households drying several ingredients at once or preserving a larger harvest.Its all-stainless construction is a clear distinction from the compact Magic Mill, whose body is BPA-free plastic. The Pro also matches Cosori’s stated 95°F–176°F range and 48-hour timer, but adds a keep-warm mode and overheat protection claims. Those extras make long cycles more convenient, though they do not eliminate the need to monitor food and follow recipe guidance. The tradeoff is size and complexity: buyers who dry only a few portions may find seven trays and the larger cabinet unnecessary. Choose it when capacity and metal construction matter more than a minimal countertop footprint.
Pros:
- Seven full-size stainless steel trays for larger batch capacity
- Rear-mounted 600-watt fan designed for even airflow
- 95°F–176°F control with 1-degree increments and a 48-hour timer
- Stainless steel interior, exterior, and trays; includes mesh screens and a fruit-roll tray
Cons:
- Larger seven-tray capacity may be excessive for occasional use
- The supplied details do not state total drying area
- Keep-warm and airflow performance claims are not independently verified here
Best for: Households that regularly dry large batches of fruit, herbs, vegetables, or snacks and want an all-stainless cabinet with digital controls.
Not ideal for: Occasional users with limited counter or storage space, or anyone who needs a compact appliance for small portions.
Bottom line: We recommend the Pro for frequent batch drying, especially when its seven trays and all-stainless build justify the larger appliance.
“We recommend the Pro for frequent batch drying, especially when its seven trays and all-stainless build justify the larger appliance.”
Cosori Food Dehydrator, 5 Stainless Steel Trays
Cosori offers the clearest middle ground between the Pro’s larger capacity and the smaller Magic Mill’s simpler setup. It has five stainless steel trays and 3.1 square feet of drying space, enough room for regular household batches while keeping the listed footprint to 13.9 × 11.3 × 8.9 inches. The rear fan and horizontal airflow are intended to dry across the trays, so buyers can avoid choosing a model that depends on frequent tray rotation.Its four presets for jerky, fruit, vegetables, and yogurt make common starting points easier to select than on the Pro, which lists precise manual controls but no presets in the supplied details. The temperature range and 48-hour timer align with the Pro, while Cosori’s 480-watt rating sits between the two Magic Mill models. It gives up two trays compared with the Pro, and the listed description does not claim an all-stainless cabinet. Compared with the compact Magic Mill, however, it offers a higher temperature ceiling and a stated drying-area figure. It is a practical fit for buyers who want accessible controls and meaningful capacity without moving up to seven trays.
Pros:
- Five stainless steel trays with 3.1 square feet of stated drying space
- Four presets for jerky, fruit, vegetables, and yogurt
- 95°F–176°F temperature control and a 48-hour timer
- Rear fan and horizontal airflow design
Cons:
- Two fewer trays than the Magic Mill Pro
- Cabinet material is not specified as all stainless steel in the supplied details
- At 10.8 lb, it is heavier than the compact Magic Mill’s listed weight
Best for: Home cooks who want a compact five-tray dryer with presets, stainless steel trays, and a stated drying area for routine use.
Not ideal for: People who need the maximum listed capacity, an all-stainless cabinet, or a particularly lightweight and compact unit.
Bottom line: We’d choose Cosori for a balance of countertop size, guided presets, and useful five-tray capacity.
“We’d choose Cosori for a balance of countertop size, guided presets, and useful five-tray capacity.”
Magic Mill Food Dehydrator Machine, 5 Stackable Trays
This compact Magic Mill takes a different approach from the two rear-fan models: it uses five stackable trays with adjustable spacing, in a listed footprint of 8.5 × 11.8 × 11 inches. Raising the tray clearance from 0.6 to 1.1 inches gives us room for thicker pieces, which is useful when a fixed, closely spaced tray design would force us to slice food more thinly. It is the smallest listed option by footprint and the lightest by the stated weights.The compromises explain its narrower role. At 240 watts, it has the lowest listed wattage, and its temperature range tops out at 167°F rather than the 176°F offered by the Pro and Cosori. Its body is BPA-free plastic with a stainless steel base and trays, unlike the Pro’s all-stainless build. The controls provide a timer up to 48 hours, but the supplied description does not specify a fan arrangement or preset programs. We’d favor it for modest batches, herbs, fruit, or pet treats where adjustable tray height and storage space are the priorities. For frequent large runs or buyers seeking the broadest stated temperature range, the Pro or Cosori is the stronger match.
Pros:
- Five removable stainless steel trays with adjustable clearance
- Compact listed footprint and 2.75 kg listed weight
- Digital timer up to 48 hours
- Trays are described as dishwasher-safe
Cons:
- Lowest listed wattage at 240 W
- Maximum temperature of 167°F, below the other two models’ 176°F ceiling
- BPA-free plastic body rather than an all-stainless cabinet
Best for: Apartment cooks and occasional users who want adjustable tray spacing and a relatively compact appliance for smaller batches.
Not ideal for: Frequent batch dryers, buyers who want an all-stainless cabinet, or anyone who needs a 176°F maximum setting.
Bottom line: We’d pick this Magic Mill for occasional small-batch drying when adjustable trays and compact dimensions matter more than speed or maximum temperature.
“We’d pick this Magic Mill for occasional small-batch drying when adjustable trays and compact dimensions matter more than speed or maximum temperature.”
As an Amazon Associate we earn from qualifying purchases.
Before You Start
Read your dehydrator manual for tray loading, temperature settings, cleaning, and whether trays can be rotated. Set the appliance on a stable, heat-resistant surface with space around its air vents. Wash your hands, utensils, and work surface. Keep raw meat and its utensils separate from produce and ready-to-eat food. Plan to check the food as it dries; times are estimates, not proof of doneness.
Step-by-Step Instructions
Step 1: Choose one food to dry
Select fresh, sound fruit, vegetables, or herbs and use a tested recipe for that food. Avoid produce with mold, decay, or bruising that extends into the flesh. If making jerky, choose a tested recipe and prepare the meat according to its food-safety instructions.
Tip: Different foods need different temperatures and preparation. Dry similar items together so their aromas and timing do not interfere with one another.
Check: You have a specific food and a recipe or manual guidance that gives a suitable preparation method and temperature.
Step 2: Wash and prepare the food
Rinse produce under clean running water and drain it well. Remove stems, cores, pits, tough skins, or inedible parts as the recipe directs. For vegetables that need blanching, follow the recipe’s time and method, then cool and drain them. For fruit, follow the recipe if it calls for a pretreatment to limit browning.
Tip: Do not soak sliced food longer than the recipe directs. Extra surface water can slow drying.
Check: The food is clean, trimmed, and drained, with any recipe-specific treatment complete.
Step 3: Cut pieces to a consistent thickness
Slice or chop the food to the thickness specified by your recipe. Make pieces as uniform as you can so they dry at a similar rate. Remove seeds or pits when directed. For herbs, use clean sprigs or separate the leaves as the recipe recommends.
Tip: Thicker pieces take longer to dry and can remain moist in the center while thinner pieces are ready.
Check: The pieces are close in size and thickness, with no unusually thick pieces mixed in.
Step 4: Arrange food on the trays
Place pieces in a single layer on the trays, leaving space between them so air can circulate. Keep food away from the tray edges if your manual warns that pieces can fall through. Do not pile food or block the dehydrator’s vents.
Tip: If your manual permits tray rotation, note which trays are at the top and bottom so you can rotate them consistently during drying.
Check: Food is spread out without overlapping, and air openings remain clear.
Step 5: Set the temperature and start the dehydrator
Set the temperature listed in the recipe or manual for the food you are drying, then switch on the appliance. Keep the dehydrator in a dry, ventilated area away from curtains and other items that could block airflow. Follow the manual’s instructions for whether to preheat the unit.
Tip: A temperature that is too low can let food spend too long drying; a temperature that is too high can harden the outside before the center dries. Use food-specific guidance rather than guessing.
Check: The appliance is running steadily at the recommended setting, with its air vents unobstructed.
Step 6: Check progress and adjust as directed
Check the food periodically, starting at the earliest check time in the recipe. Rotate trays only if your manual or recipe calls for it. Remove individual pieces as they reach the stated doneness and continue drying the rest. Keep a note of the actual drying time for your next batch.
Tip: Drying can take longer in humid conditions, with crowded trays, or when pieces are thick. Avoid opening the unit more often than needed because heat escapes.
Check: Pieces are drying evenly, and you are checking them against the recipe’s doneness cues rather than time alone.
Step 7: Test pieces for doneness
Remove a representative piece and let it cool briefly before testing it; hot food can feel softer than it will when cool. Follow the recipe’s texture test. Fruit is often pliable or leathery, while vegetables are usually dry and brittle. For jerky, use the recipe’s safety and texture checks; do not rely on appearance alone.
Tip: If the piece is still wet, sticky, or moist inside when the recipe calls for it to be dry, return it to the dehydrator and check again later.
Check: A cooled sample matches the recipe’s texture and safety criteria, including any specified heating step for jerky.
Step 8: Cool, condition, and store the dried food
Turn off the dehydrator and let the food cool completely on a clean surface. For dried fruit, follow a tested conditioning method: loosely place cooled pieces in a clean, airtight container and shake it daily for the period the method specifies. If moisture appears inside, return the food to the dehydrator. Once ready, seal it in clean airtight containers, label each with the food and date, and store it in a cool, dry, dark place.
Tip: Do not seal warm food; trapped heat can create condensation. Discard food that develops mold or an unusual odor.
Check: Food is fully cool, dry, labeled, and sealed, with no visible condensation in the container.
Common Mistakes to Avoid
- Overlapping pieces or filling the trays too tightly. — Arrange food in one layer with gaps between pieces so air can move around them.
- Stopping when the suggested drying time ends without checking texture. — Use the recipe’s doneness test on cooled samples; extend drying when pieces remain moist.
- Storing food before it has cooled completely. — Cool the food on a clean surface before sealing it, and check containers for condensation.
- Assuming dried meat is safe because it looks dry. — Follow a tested jerky method, including the required heating step and temperature guidance.
Troubleshooting
Problem: Some pieces are dry while others remain soft.
Solution: Remove pieces that have passed the doneness check. Continue drying the softer pieces, and check that the remaining food is cut evenly and spaced apart.
Problem: Food is taking much longer than the recipe estimate.
Solution: Check that vents are clear, trays are not crowded, and pieces are not thicker than directed. Continue checking doneness; humid air and appliance differences can extend drying time.
Problem: Fruit darkens during preparation or drying.
Solution: Use the recipe’s recommended pretreatment and work in manageable batches. Darkening can affect appearance; judge readiness by the recipe’s texture test.
Problem: Condensation appears in the storage container.
Solution: Return the food to the dehydrator and dry it further. Cool it completely, then reseal it in a clean container and check again.
What Success Looks Like
The batch is evenly dried to the food-specific texture described by its tested recipe, with no damp centers in samples that should be dry. Any jerky has received the required safety treatment. The food has cooled fully and is sealed in a labeled container without condensation.
Next Steps
Record the food, slice thickness, temperature, and drying time so you can refine future batches. Check stored food periodically for condensation, mold, or unusual odors; discard anything spoiled. Clean the trays and dehydrator as the manual directs, and repeat the process with one food type at a time until you know how your appliance performs.
Frequently Asked Questions
How long does food take to dry?
It depends on the food, thickness, amount on the trays, appliance, and humidity. Use the recipe’s time as a starting point, then test cooled pieces for doneness.
Can I dry different foods at the same time?
You can if their required temperatures and drying times are compatible, but foods can transfer aromas. For more predictable results, dry one type at a time.
Do I need to blanch vegetables first?
Some vegetables benefit from blanching, but the method depends on the vegetable and recipe. Follow tested food-specific instructions rather than blanching every item by default.
Can I make jerky by drying raw meat at a low temperature?
Do not rely on low-temperature drying alone to make raw meat safe. Use a tested jerky recipe that specifies the required heating step, temperature, and handling precautions.
How should I store dried food?
Cool it completely, then store it in a clean airtight container in a cool, dry, dark place. Label it with the food and date, and check for condensation or spoilage during storage.